
At this time of year there isn’t much going on in the outdoor portion of my garden, so most of my horticultural energies are focused on my greenhouse. I thought it might be worth writing about how and why I built a greenhouse for growing orchids and other tropical plants, what worked well, what I would do differently if I had to do it again, and what I have learned from almost seventeen years of growing plants under glass polycarbonate.
1. Why build a greenhouse?
If you have to ask, you probably aren’t an orchid grower.
My orchid hobby started in the usual manner, with a single plant purchased from a local garden center. There are approximately 23,000 natural orchid species and more than 110,000 orchid hybrids registered with the Royal Horticultural Society, so the novice orchid grower soon becomes aware that there are a lot of really interesting plants he or she could be growing. Within a few months I had half a dozen orchids growing on a desk in the living room of my little student apartment.
I bought a book to figure out why some of my plants weren’t doing very well. The book had lots of useful advice and the addresses of several mail order nurseries at the back. I joined a local orchid society. The society had raffles and silent auctions and speakers who brought plants to sell.
Based on the advice in the book, I moved the plants closer to the window and added a fluorescent light. And added more plants, of course.
A year later, I had added another light and doubled the growing area.

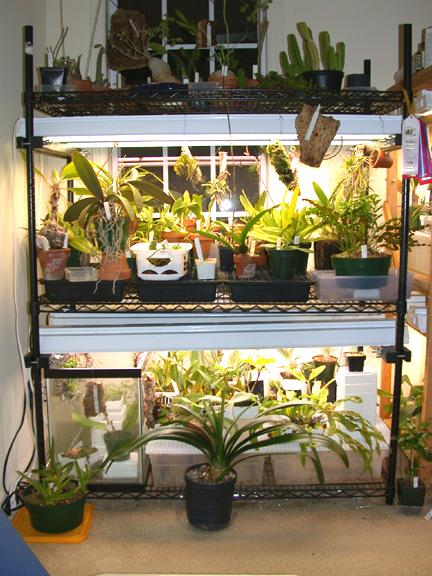
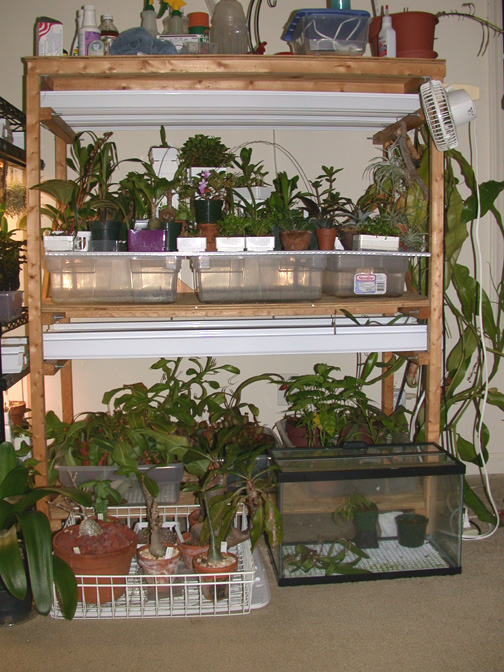
When the growing area was full again, I built a two-tier light stand. Then I added a second one. By 2001, I had two light stands in a spare room, and in addition to orchids I was growing a variety of succulents, carnivorous plants, and ant plants. Watering the plants was taking about two hours, twice a week, because I didn’t want to spill water on the carpet.
At this point in the standard progression, the orchid addict hobbyist generally looks for an alternative growing area where water can be splashed around without ruining the floor. In the north, people sometimes convert a basement–preferably one with a floor drain–and grow orchids under lights. In the south, greenhouses are more common. Around this time, my wife and I had bought our first house, and like many in North Carolina it was built on a crawl space, not a basement. Splashing water on the carpet of a rented townhouse only risked our security deposit. Splashing water on the hardwood floor of our own house was another matter entirely. I decided to build a greenhouse.
2. The first greenhouse
After obsessive research, I decided to build a 10′ x 16′ frame of pressure-treated lumber and glaze it with 8-mm twin-wall polycarbonate panels. Although translucent polycarbonate isn’t as attractive as glass, the two layers separated by 8 mm of dead air provide better insulation. Inexpensive polyethylene film was contraindicated, because the NC piedmont is basically one large forest infested with squirrels. Trees drop branches, and squirrels drop hickory nuts, both of which can crack glass or tear poly film when they fall from a great height. I chose pressure treated lumber for the frame, because a) metal was more difficult to work with, b) naturally rot-resistant wood like cedar or redwood was prohibitively expensive, and c) prefabricated greenhouse kits were expensive and often seemed flimsy.
Because the ground doesn’t freeze to any appreciable depth in the NC piedmont, the greenhouse didn’t require a deep insulated foundation. I rented a two-person auger, and some friends helped to dig six post holes.
The greenhouse was built on a slope, and instead of breaking my back leveling the ground, I built a low wall of 4″x4″ timbers and a single step spanning the full width of the greenhouse half way along its length. The same friends then helped me build the frame with joists and rafters spaced to support 4′-wide polycarbonate panels. We also framed spaces for an exhaust fan above the door and motorized shutters at ground level on the opposite end. North Carolina summers are far too hot for the passive roof vents that are used in cooler climates.
The polycarbonate panels were attached with stainless steel screws (that wouldn’t corrode in pressure-treated wood). A storm door and an aluminum ridge cap completed the skin of the greenhouse.
My father-in-law, a plumber, ran a cold water pipe from the house in a trench buried below the frostline, and we used the same trench to run wiring for the lights, exhaust fan, and intake shutters.
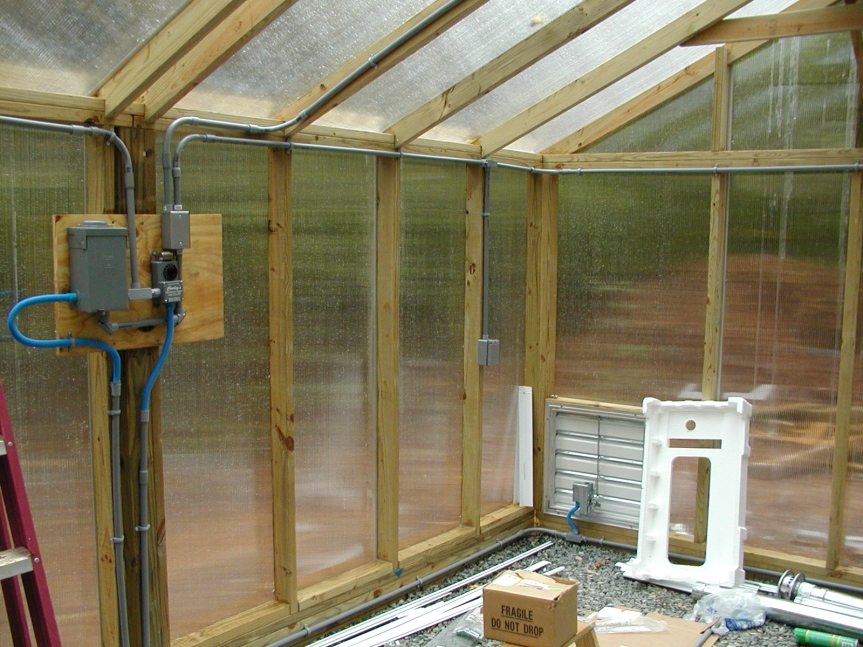
The greenhouse was cooled by a combination of air exchange and evaporation. A single-stage thermostat controlled both the exhaust fan and intake shutters. As the drier outside air entered the greenhouse, a humidistat triggered misting nozzles mounted under benches. As the mist evaporated, it both cooled and humidified the incoming air. Using this system, I was able to keep the greenhouse several degrees cooler than the outside air, even on sunny summer days.
For heating, I used a vented Southern Burner greenhouse heater. The Southern Burner is a very simple design that relies on a pilot light and millivolt thermostat. The trickle of electricity required to trigger the gas valve is supplied by a thermocouple protruding into the pilot flame, so the heater is completely independent of mains electricity. This feature proved its worth when we lost electricity for a week following an ice storm.
The first winter, I learned a couple of things: 1) LP gas (propane) is expensive; 2) although better than glass, twin-wall polycarbonate isn’t a very good insulator, and 3) the north wall of a greenhouse is a heat sink. I had oriented the greenhouse with its long axis running east-west to take full advantage of the low winter sun, but that orientation meant that the north wall and north slope of the roof received very little light in winter. To save heating fuel, I wanted to add additional insulation, but insulating a greenhouse is problematic–most substances that are effective insulators are more-or-less opaque. On the north wall, that wasn’t a problem, so I added Reflectix insulation (basically bubble wrap sandwiched between two layers of reflective film). On the remaining three walls and north slope of the roof, I used clear bubble wrap to create an additional dead air space without significantly reducing light penetration. Only the south roof was left uncovered to allow maximum penetration of the winter sun.
This greenhouse served me well for about five years, but when our growing family necessitated a move to a slightly larger house, I seized the opportunity to design a new structure that incorporated some of the lessons I had learned.
3. The second greenhouse
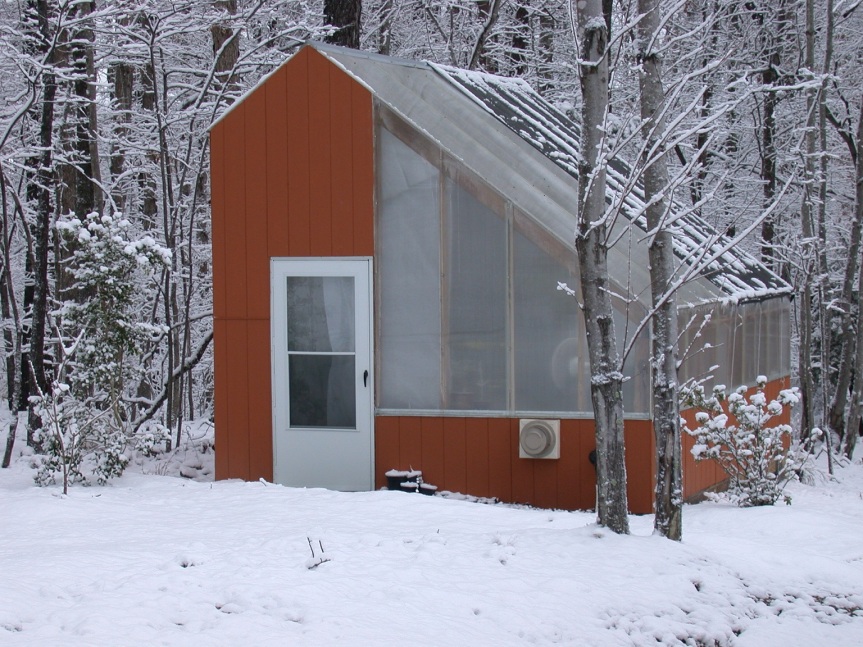
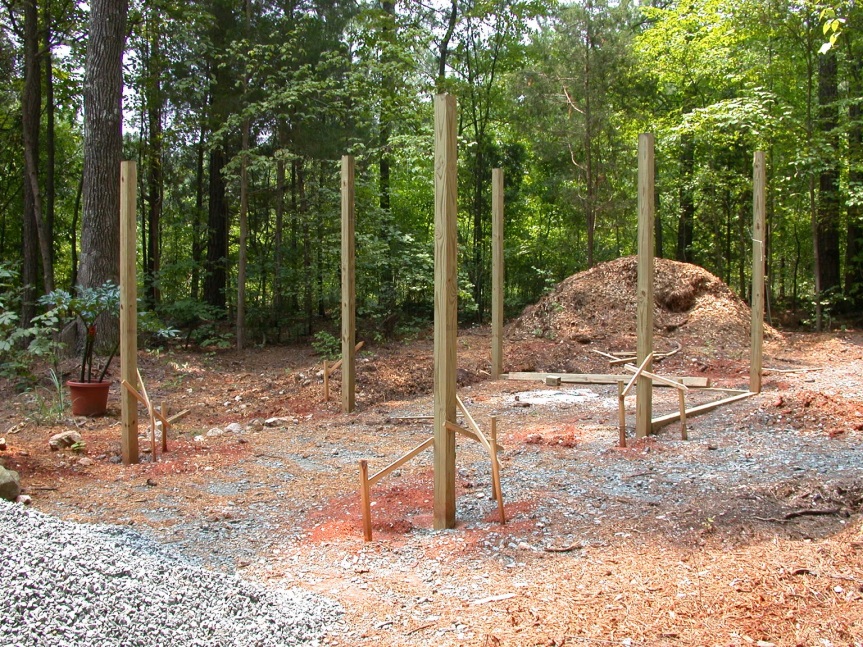
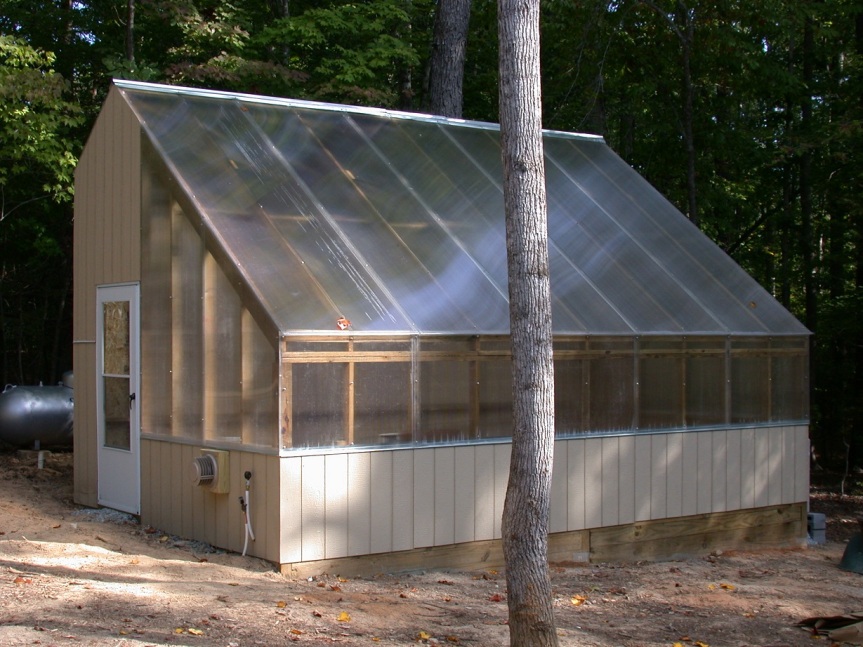
The second greenhouse–my current greenhouse–was built in 2007. It is 14’x20′ and like the first is polycarbonate on a wooden frame. I made the new greenhouse wider than the first, because I had learned that 10′ was an awkward width. When I added two benches for plants along the sides of my first greenhouse, the central aisle was wider than necessary but too narrow to fit a third bench. 14′ is wide enough for three benches and two narrow aisles–more room for plants and less wasted space.
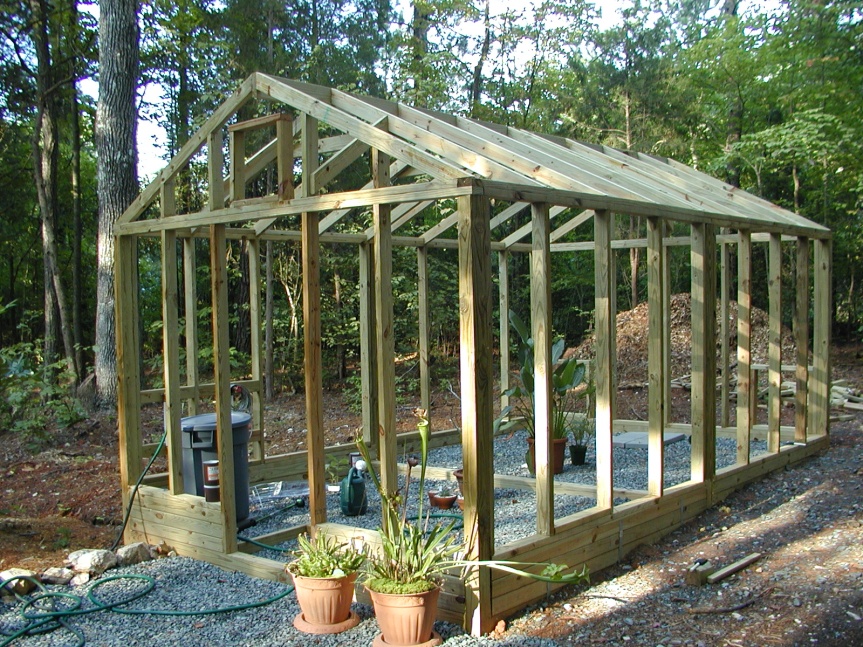
I also considered the problem of the north wall and northern roof slope. Eventually I settled on an asymmetric roof with a long south-facing slope and short north-facing slope. Due to the uneven stresses on the walls, this design required the roof to be supported with posts at the ends and at the center of the span. The post above the door rests on a heavy lintel, and the weight is then distributed to the door frame.
I had initially planned to pour a proper concrete foundation, but the only place suitable for a greenhouse on the new property was directly in front of a beautiful hickory tree. To protect its roots, I ended up replicating the foundation design of the old greenhouse: six posts embedded in concrete and connected by 4″x6″ timbers anchored to the ground with rebar.

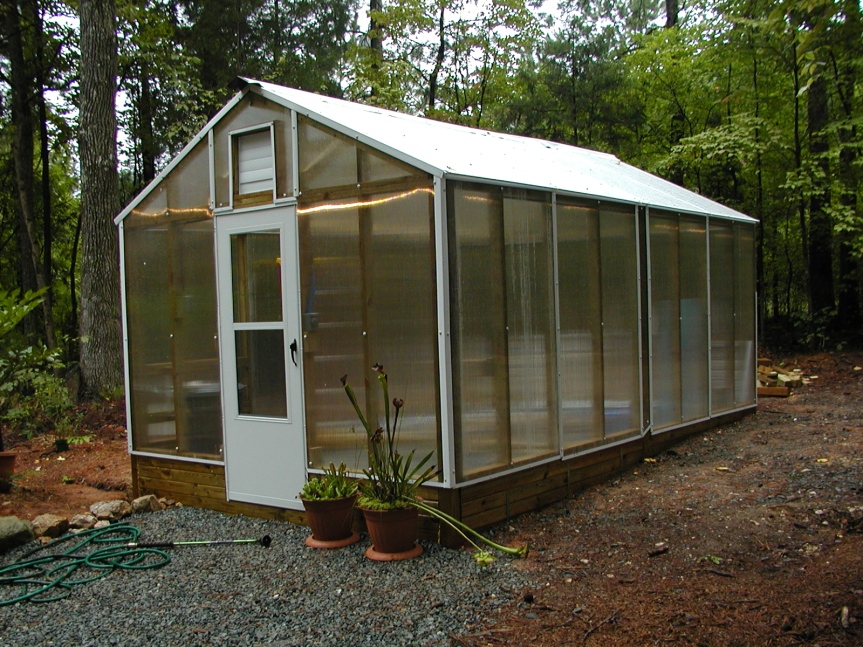
For glazing, I again used 8-mm twinwall polycarbonate, but this time, the north wall, part of the east and west walls, and the south wall up to the level of the greenhouse benches were all covered with wooden siding. Behind the siding, I inserted rigid foam insulation and then covered it with Reflectix. The result was a very bright but well insulated greenhouse.
I was somewhat dissatisfied with the cooling scheme in my old greenhouse–the misting nozzles left the floor very wet and humidity too high–so I tried a different approach. Instead of pulling hot air out of the greenhouse with an exhaust fan, I purchased a swamp cooler that pushes cool, humidified air into the greenhouse without making everything too wet. The particular model I chose is a freestanding, ductless unit that is basically maintenance free, requiring only replacement of the aspen wet pads every few years. Swamp coolers are most efficient in dry climates like the desert southwest, but in humid North Carolina, evaporative cooling keeps the greenhouse under 90 F (32 C) even when the temperature outside spikes above 100 F (38 C).
Pushing cool air into the greenhouse requires that hot air has a way to escape. The support post above the door meant that I couldn’t tuck an exhaust shutter up under the eaves, so I installed them on the north wall. The swamp cooler and shutters are controlled by a two stage thermostat allowing them to operate at different temperatures. The shutters open several degrees below the temperature at which the swamp cooler turns on, so on sunny winter days the greenhouse can be cooled by passive air flow rather than actively blowing large volumes of cold air over the plants.
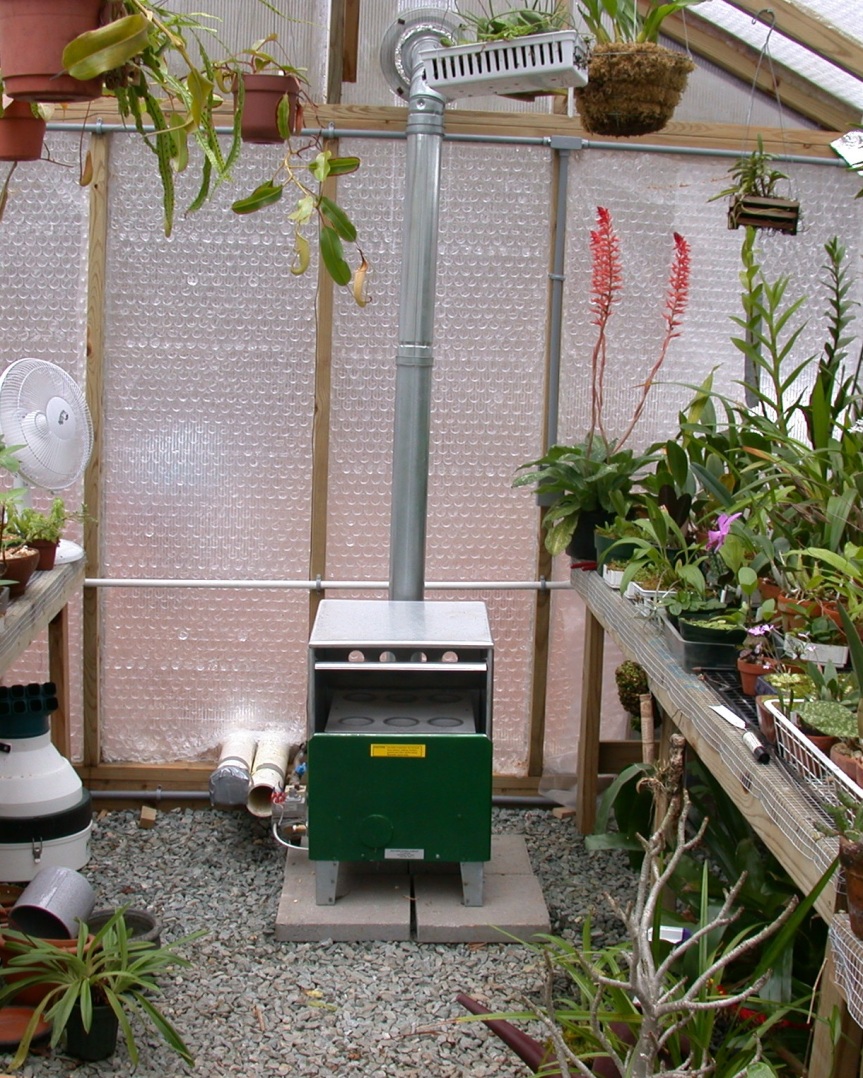
For heating, I chose an Empire Direct-Vent heater. Like the Southern Burner, the Empire is controlled by a millivolt thermostat and is completely independent of mains electricity. However, the combustion chamber of the Empire draws air from outside, allowing the greenhouse to be sealed up tight in cold weather. There’s no need for cold outside air to be piped into the greenhouse, and warm, humidified air is not lost up a flue.
The final critical piece of equipment is a standby generator so that the cooling system will continue to operate is the electricity goes out during a summer storm. This generator also runs our refrigerator, freezer, and well pump (allowing toilets to be flushed), so it was an easy sell to the non-orchid-growing members of the family.
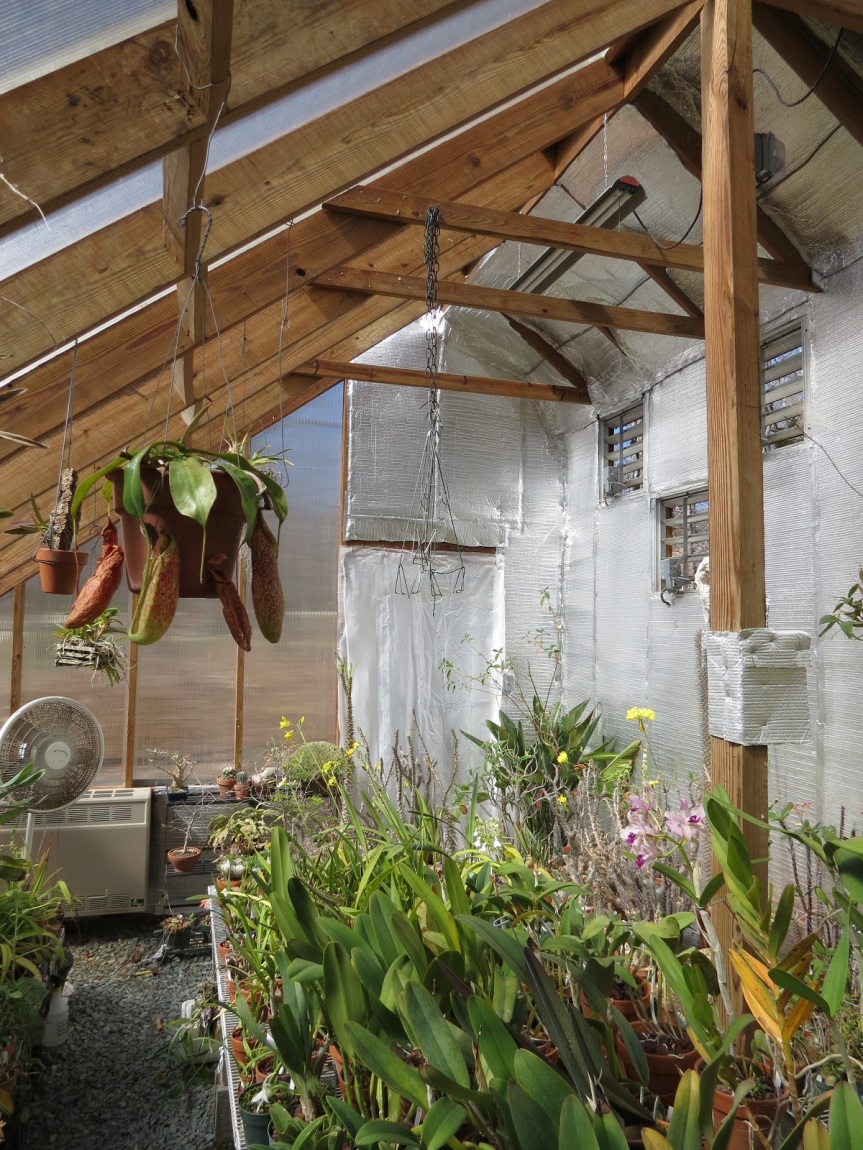
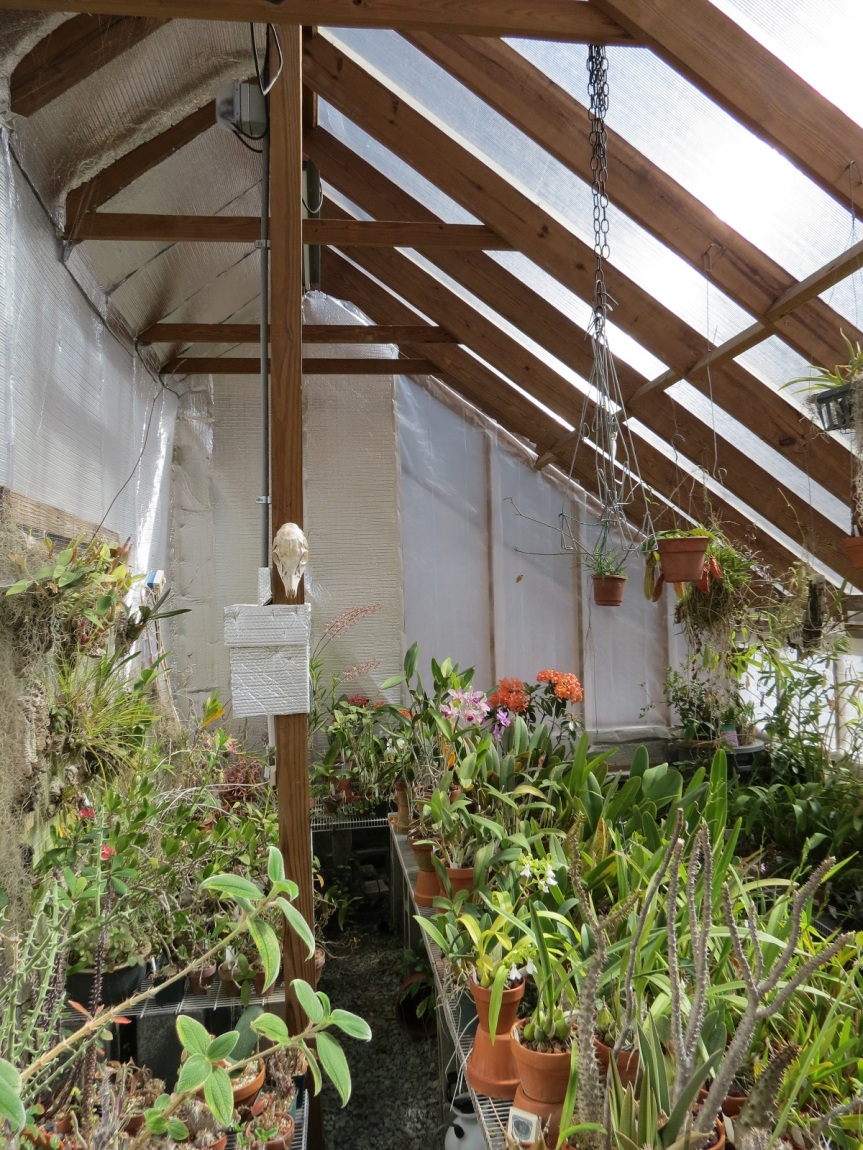
This greenhouse has now been in operation for almost 12 years, long enough for me to thoroughly assess its strengths and weaknesses. The evaporative cooler works very well, as does the direct-vent heater. The greenhouse is much better insulated than my previous design, and the long south-facing slope of the roof, combined with reflective covering of the high north wall makes it much brighter. The greenhouse is over 12′ (almost 4 m) tall, a somewhat ridiculous height, but the steep pitch of the roof sheds snow very nicely. However, the 12′ 6″ south slope of the roof is really too long for a single polycarbonate panel. At that length expansion and contraction at different temperatures is significant enough to loosen screws, and there is no easy way to access the center of the roof to tighten them. Because the exhaust shutters are in the north wall, hot air becomes trapped in the peak of the roof and may shorten the lifespan of the polycarbonate panels.
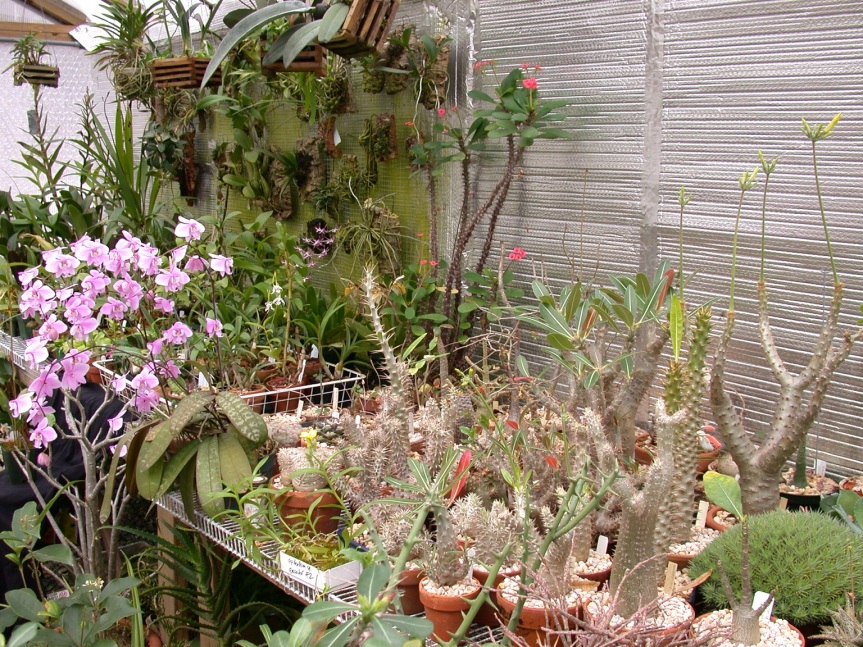
A longer and narrower design would have reduced the height of greenhouse and made the roof panels shorter, perhaps reducing the problem of expansion and contraction. Vents mounted in the north slope of the roof would have prevented hot air from becoming trapped, but designing a hood to keep off rain would have been complicated. Overall, however, I am pleased with the performance of my greenhouse design. It allows me to grow a very wide range of plants, as you can see from the various entries on this blog.

So interesting – Thankyou: I’m about to do an RHS exam on protected structures next Tuesday and seeing your two greenhouses and hearing the practical side of how you decided to do what, when really brings it to life!
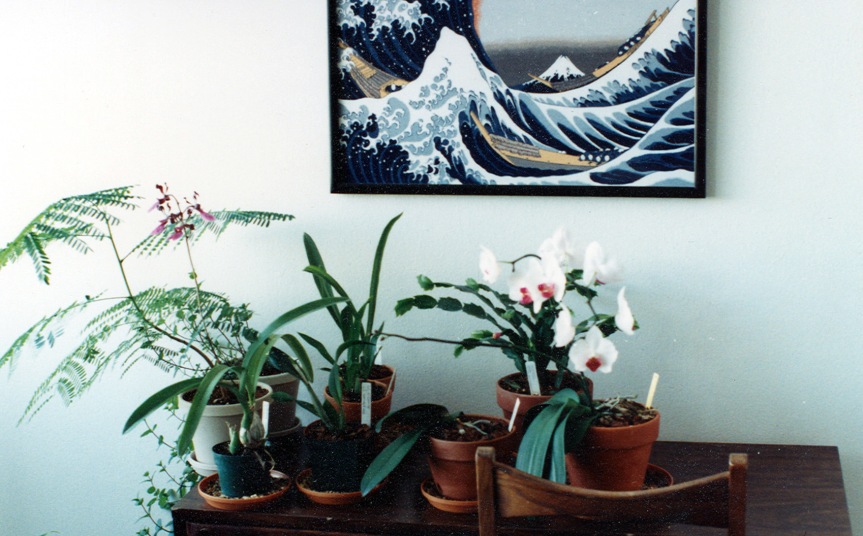
Your first picture of orchids on a cabinet looks suspiciously like our dining room!
LikeLiked by 2 people
Good luck with your exam! I hope you do well.
LikeLike
Excellent result! I love it and your obsession is similar to mine (lower level). I would be curious to know the cost of each of the greenhouses ( approximately) … The mine in glass (aluminum frame) is not well insulated and to take example on all that I can read on Twitter is great and it gives me a lot of evolutionary ideas. Thank you.
LikeLike
I’ll look through my records and see what I can find. The cost of the second was inflated, because I was busy with work and moving so I hired builders fo construct the frame. They billed by the hour and were very slow.
LikeLiked by 1 person
thank you, if you prefer the discretion I can give you my email
LikeLiked by 1 person
Sure, send it via the contact page on the blog.
LikeLiked by 1 person
I am enjoying my first orchid success and thinking where I can put more. I may be in trouble.
LikeLiked by 1 person
Such a useful post, and your blog is always an excellent read. My biggest take-away is the relief I have that my first orchid quickly died and the second did the same as well.
I’m sure the fact I’m up to 8 grow lights means nothing.
LikeLiked by 1 person
I’m glad you included so many details.
Very helpful.
Is that a fox or opossum skull in the last two pictures?
LikeLiked by 1 person
It’s a deer!
LikeLike
My! How fancy. I am a professional, and I do not work in such greenhouses. Did you see my second post today? Greenhouse Envy?
LikeLiked by 1 person
It’s never fun when big trees come down, but I suppose better the greenhouse than the home. The big hickory behind my greenhouse occasionally drops limbs that bounce off the polycarbonate, but hopefully its roots remain strong.
LikeLiked by 2 people